To start adding your categories, first go to Customization menu → General and click the Create button to add default pages and menus.

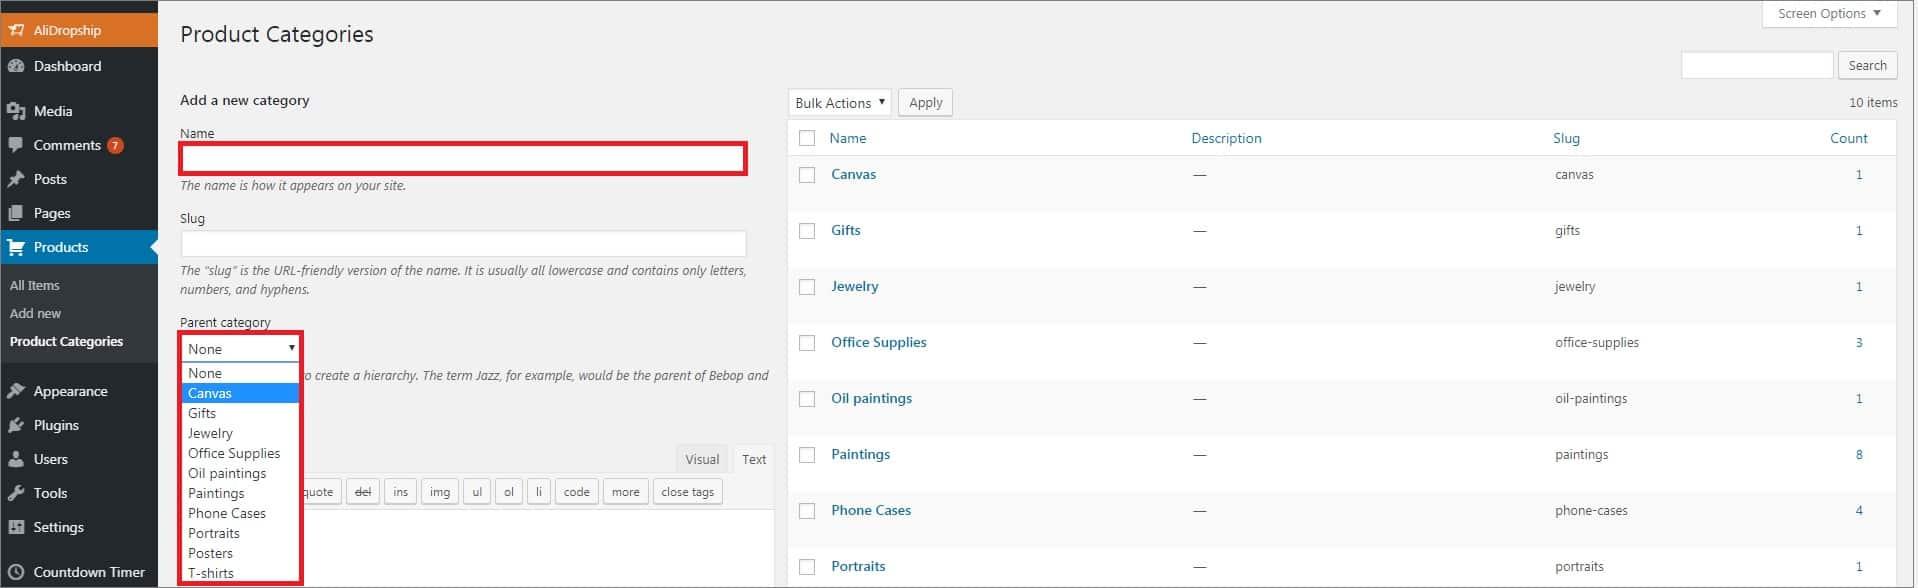
Go to Products → Product Categories and select categories you want to Edit or create a new one.
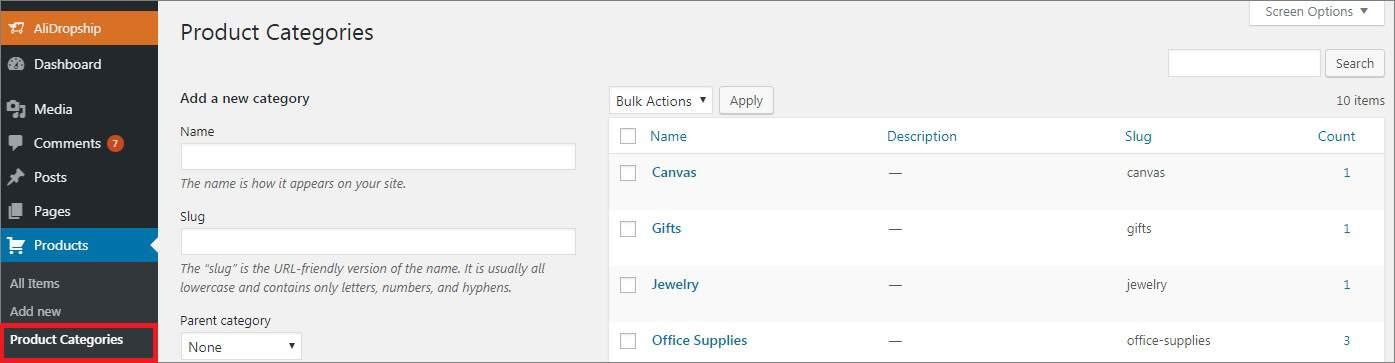
To create a subcategory, add its name and select the corresponding parent category. Click Add a New Category.
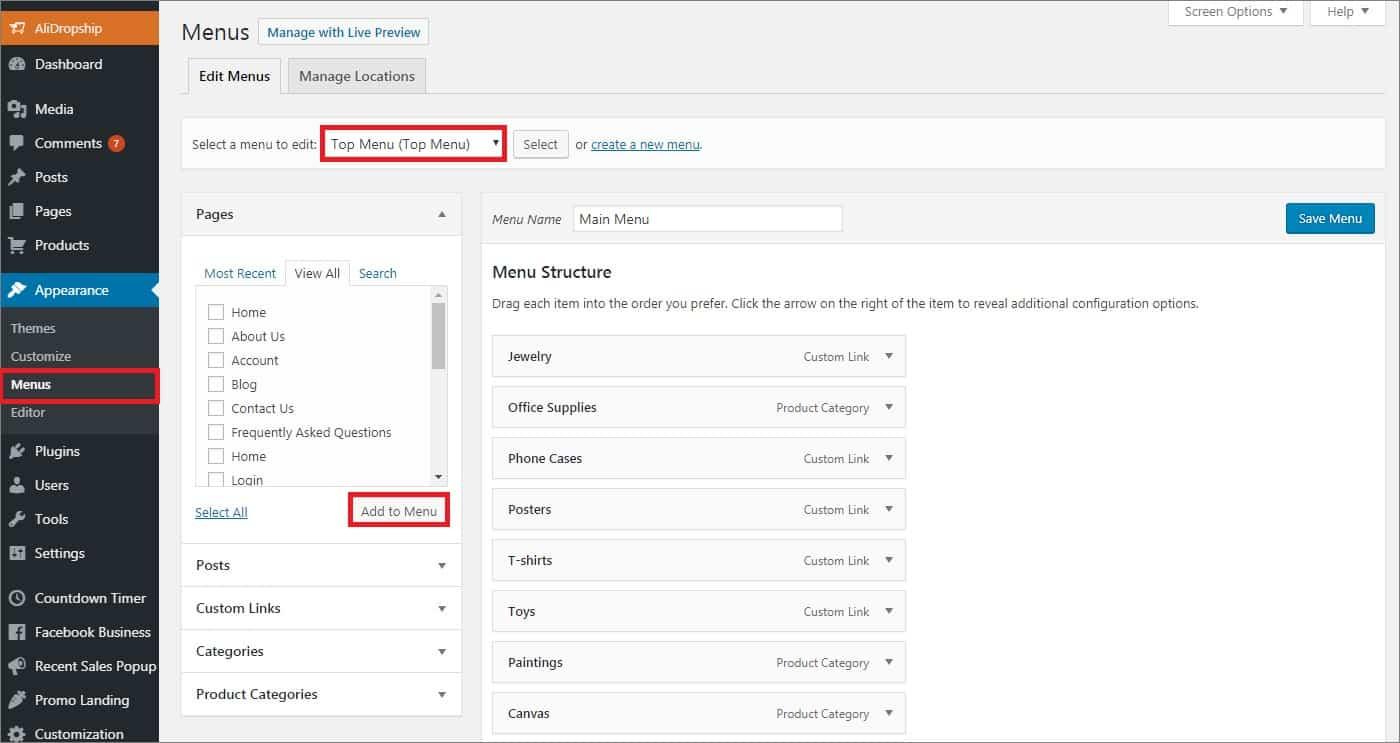
Once your product categories are created, you can proceed with organizing your website menus. There are 2 of them in the Rembrandt theme: Top Menu and Footer Menu.
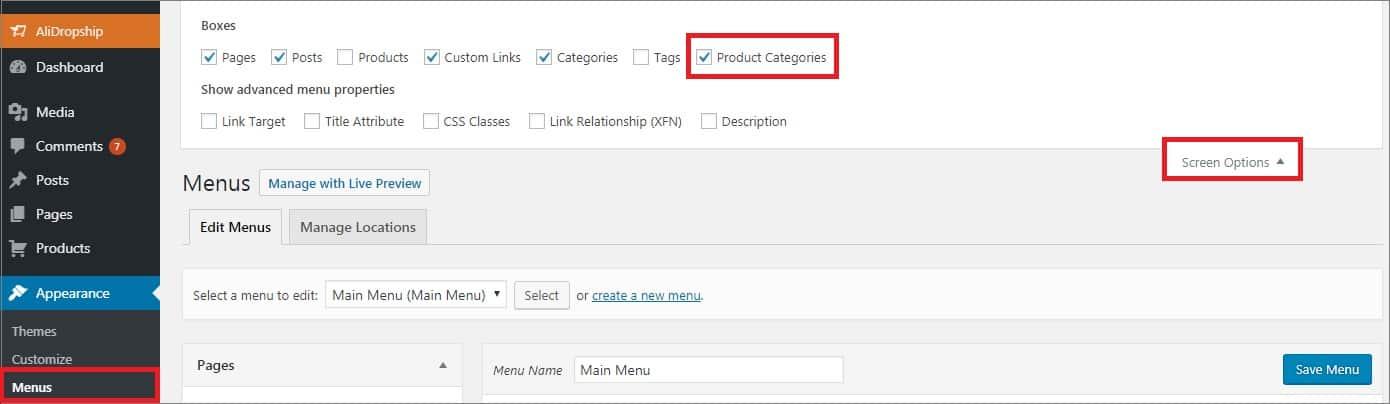
To manage them, go to Appearance → Menus and select a menu to make changes to or create a new one. Check items which should be added to you menu in the left-hand sidebar. To make sure you see all groups of items, click Screen Options at the top of the page and check groups you want to add to menu. Drag items to change their display order and make sub items. You can edit them by clicking the down arrow symbol.
Please note that only those categories that you have assigned at least one product to are displayed on your homepage.
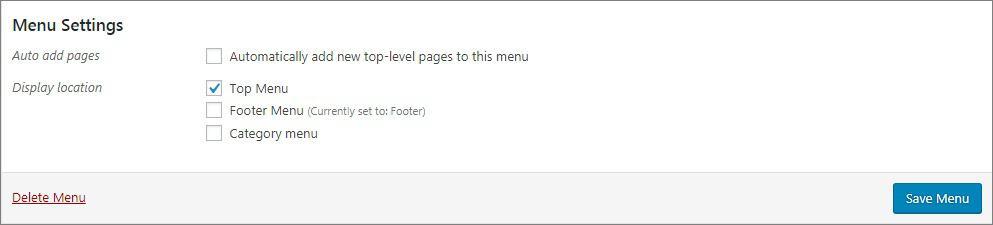
Once you have completed editing your menu, check desired display location at the bottom of the page in Menu Settings and click Save Menu.
Alternatively, you can click Manage with Live Preview at the top of the page to see changes on your website front-end as you make them.
Customization
To adjust theme customization settings to your needs and modify your website appearance, go to Customization.
General
You can edit some basic configuration settings such as adding default pages and menus, changing template colors and images, integrating Google Analytics ID, etc.

Head
You can add and edit scripts and styles in Head.

Header
Go to the Header section to change your logo and additional image.

Home
You can modify the way your homepage looks like: paste your YouTube video ID, change text color, add an article, manage features, etc. To change your grid images, click the Upload button, select files from your media or upload a new one from your computer.

Single product
Manage your single product page in the Single product tab: enable product information tabs, make social media icons appear, add Leave a review box and many more. Here you can edit ‘Shipping & Payment’ text as well.

Checkout
Customize your Checkout page.

About Us
Tell your customers more about your company and post photos of your employees.

Thank You
You can edit text which is shown to your client when a payment is complete or it failed and add conversion tracking scripts.

Contact Us
Edit text displayed on the Contact Us page above your contact details and add a map so that it is easier for your customers to find your office.

Blog
Right-hand side images on the blog page and subscription form are managed in this section. You may check further details here.

Social Media
To add your social media links, go to Social Media and fill in the appropriate fields. Refer to this guide to check further details.

Subscribe Form
Paste your subscription form code here to complete subscription setup. If you are interested to learn how to set up subscription form, check out this link.

Footer
Change the look of your footer by adding payment, delivery and security proof icons.
